During my summer in between University I decided to look into 3D modelling, I created all of the models and textures for this creepy scene, heavily inspired by Silent Hill. I used 3DS Max software for the models by watching YouTube videos and drew textures in photoshop then added them onto the models. After that I imported everything into the unreal engine and used the lighting tools to create the creepy scene. I did not know of software such as substance painter before doing this to save time, despite this I had a lot of fun creating my own textures and using lighting to set up the scene in the Unreal Engine.
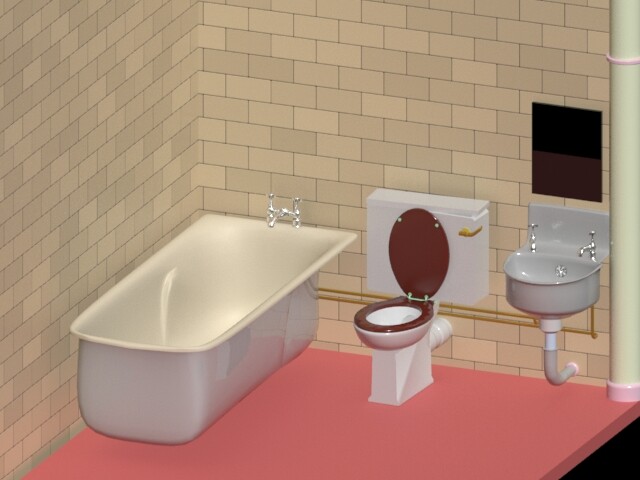
I started off looking at real life bathrooms online and copying the scale of the utilities. This was so my models would be a realistic size and match one another. Next I began by starting with the bathtub then onto the taps. I painstakingly created the taps in about 30 different pieces so I could delete a part if it went wrong (a big learning curve). I would then attach them altogether once I was happy with the pieces.
Next up was the sink and all of it’s piping, I remember it was very difficult to get the sink into a perfect curve but this was as close as I could get.
From the sink I moved to the toilet. Again this involved making lots of different parts and then merging them together. I slightly moved the water tank lid as to not make the objects too “perfect” as the scene was going to be a destroyed bathroom. It was difficult to find the correct balance but there were a few objects I bent and moved to give this effect.
I added a mirror which would be covered by a “dirty” texture and some large piping in the corner. I remember wanting to make it as realistic as possible by making sure the taps for the bathtub and sink had pipes for where the water would come from.
Texture work
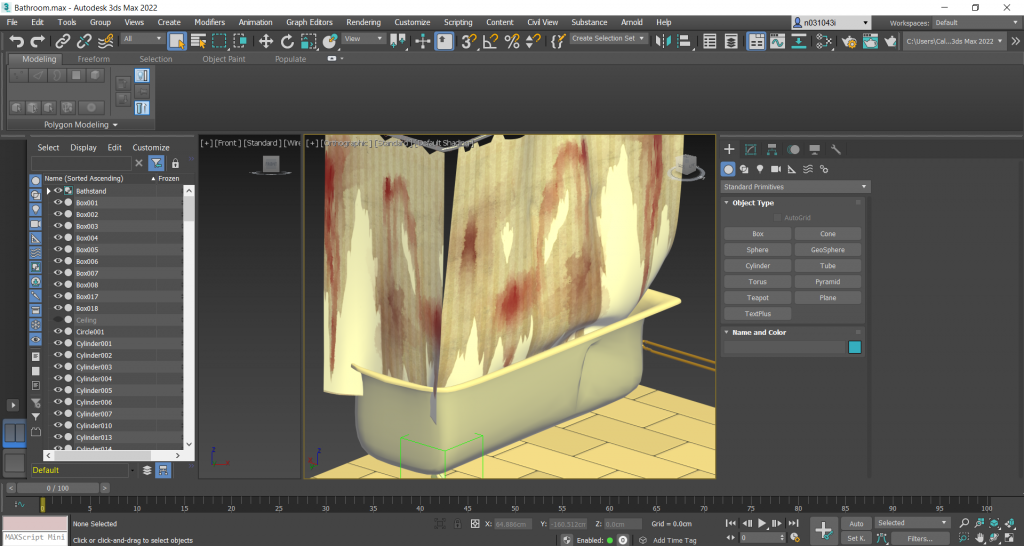
This is where I started to create the textures for the room, starting with the tile set. I took a lot of inspiration from Silent Hill 3 and it’s textures, I wanted to make sure the blood looked like blood so added in orange colours then smeared them into the red to create the look shown below. The blacks and greys were to show a mould like effect, I used special shapes and multiple layers to create the “grime”.
An example of the textures all made using photoshop by painting them in and adding layers:
Once the main utilities had been done I wanted to create a shower curtain to obscure the body that would be hanging in the scene. This was to give the viewer a chance to use their imagination as to what was behind it. I created this with rectangle shaped, copy pasting them and adding my grime layers. The shower curtain needed to have some kind of tear so the body could be seen slightly. I simply erased part of the curtain to give the curtain a torn up look.
Unreal Engine & Lighting
Next was importing the texture into 3DS Max and placing it onto a plane. I then used a tool to give the plane physics, added a shower rail with hoops and then added it to the scene in Unreal Engine.
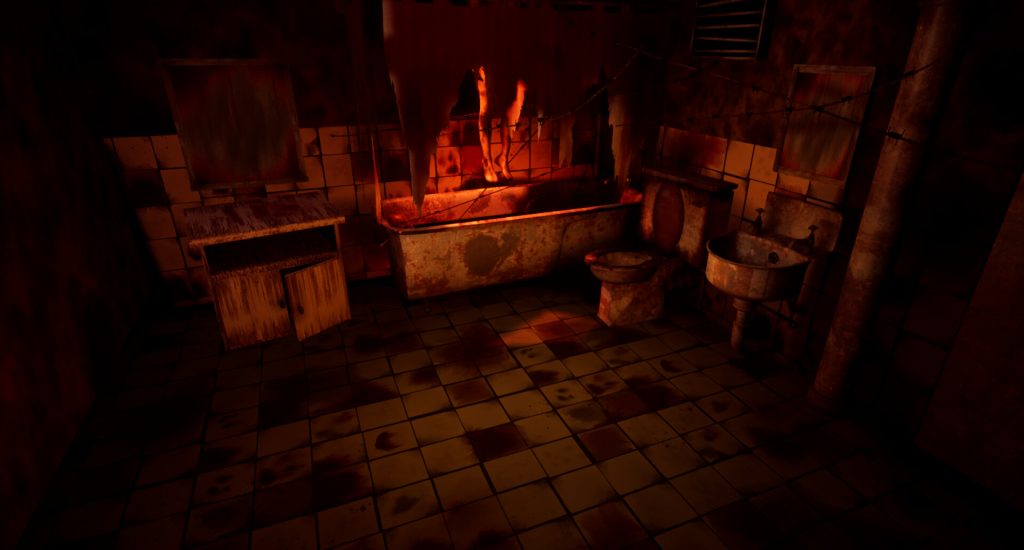
By this point I had tried multiple times to model a human body hanging and had failed many times. The model did not look real enough and it was far from my skillset. I did some research and came across Mudbox, this let me import a body premade to save time (this is also the part of the scene I am least happy with). I made a texture to go over the body to make it look decomposed and added it to the scene hanging on barbed wire. (Yes I know this sounds crazy!).
The bathroom still looked too empty so I modelled a cabinet and self made texture a mirror hanging above and a broken air vent attached to the wall.
Once everything was in place I messed around with the lighting and added a filter to the camera lens to give the screenshots a bit of a noise effect.